Upcycle and give old furniture a new lease of life


Get inspired
One of the largest thriving upcycling communities on the internet can be found on visual discovery tool Pinterest, which showcases an incredible range of creativity and ingenuity. Edinburgh-based upcycler Amy Dolan likes to put colourful spins on new furniture and finds inspiration without even looking for it: “I love blissfully pinning away, collecting everything and anything which catches my eye,” she says. “I tend not to be too conscious of what I’m pinning but when I look back over my pins it’s amazing to themes in the colours and styles that I am subconsciously drawn to. But if I am looking for something specific, all I have to do is type it into a search and there it is!”
The right stuff
Often, older furniture suitable for upcycling is sturdy, well made and could last for generations, so it’s worth keeping an eye out for potential upcycling projects beyond your own home. Glasgow-born interiors columnist and TV presenter Andrea McLean advises: “Scour car-boot sales and charity shops like British Heart Foundation Furniture & Electrical stores for great value second-hand furniture. When shopping, look for a shape or style of furniture you like. This will be your base for upcycling.”
Advertisement
Hide AdAdvertisement
Hide AdEmily Bevan-Pritchard, who runs Glasgow-based furniture upcycling and restoring firm Emily Rose Vintage agrees: “There is so much furniture out there, I have made it my mission to fill my home with pieces I have found in the street, been given, swapped, bought on Gumtree or sourced from charity shops.”
Quality control
Upcyclers need to be discerning, according to Pinterest pinner Amy. “The fun of upcycling is that when you find a piece that’s a little scuffed and scratched, you can paint over those blemishes,” she says. “However, it does pay to source a piece that is in reasonably good condition as then you don’t have to commit to painting the whole thing. Leaving some surfaces unpainted keeps an element of their original charm.”
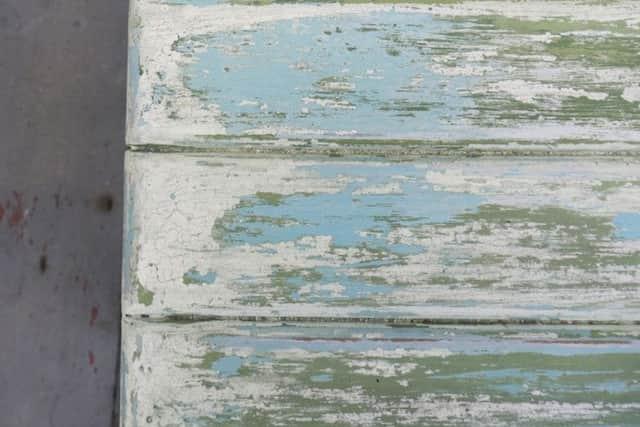
Getting the vintage look
“Building up colour is a great way to make a piece look like it was painted 100 years ago,” says Emily. “If you are using conventional paint, use a tinted primer most hardware shops will tint primers to a grey so when you sand back there isn’t new white paint showing through. Then build up your colours in neutral tones underneath your top colour in layers so when you sand it you get the old wood the three or four different tones. I use Miss Mustard Seed Milk Paint or Fusion Mineral Paint for these looks which needs no priming though but are great for this technique. You can dark wax afterwards to add more aging as well.”
Andrea adds: “Chalk paints are great for painting over a dark stain or veneer as they don’t need to be primed and give smooth all-over coverage. Always apply at least two or three thin layers of paint and finish with a layer of varnish or furniture wax.”
Embracing broken
Scratch behind the surface and you could unearth a hidden gem, advises Emily. “Don’t ignore scratched and chipped veneer pieces - these are easy to fix and you will pick them up much cheaper than solid wood,” she says. “Often the wood underneath is great anyway - you can steam off veneer with a damp old towel and an old iron (don’t use one you want to use for clothes again!) then sand the wood beneath. It you are painting a piece, however, use a scraper to get all the loose veneer off then use car body filler mixed with hardener to the damaged areas. Use a putty knife to flatten it all out. Let it dry and sand flush with the wood, then you can go ahead and paint in any way you wish.”
If a small table is particularly badly scratched, Tina Cairns of Glasgow upcycling studio Brawbits has a solution: “Use a combination of tile adhesive and group to fix glass pebbles to disguise a scratched table top with a mosaic,” she says.
The devil is in the detail
Sometimes you don’t need to do much to a piece to make a big difference. “Just adding some vintage wallpaper inside drawers and changing handles really brings things alive and makes them feel special,” says Emily. “Little details like this can transform a piece.”
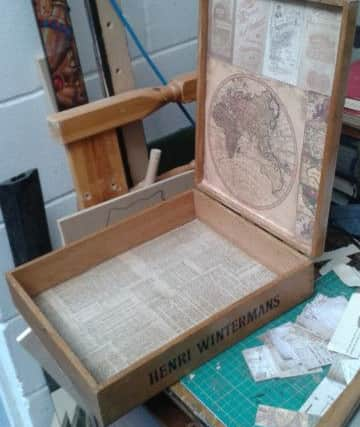
It’s a philosophy shared by Tina. “Decoupage papers can bring an old cigar box back to life, perfect for emptying pockets, keys, change into.”
Show them who’s embossed
Advertisement
Hide AdAdvertisement
Hide AdEmbossed designs can literally make an otherwise uninteresting item of furniture stand out, and it’s an effect that’s surprisingly easy to achieve, according to Emily.
“I love this technique and if you have a boring flat-fronted piece of furniture this is a great way to make it look amazing,” she says. “Sand your piece down and clean it well, ready for painting. Apply your stencil with repositionable spray mount. Use some embossing pasted and apply it with a flexible putty knife. Smooth it all out then remove the stencil. Give the stencil a wash so its ready for next time and leave the paste to dry. You will be left with a hard raised design that you can paint over and sand it all back around the edges. Apply dark wax if you want a more aged look.”
Use painter’s tape
“Painter’s tape rocks,” says Emily. “Geometric patterns wouldn’t be possible without it. Use good quality stuff and apply it to a sanded and cleaned piece in your chosen pattern. Use less paint than normal and build up the coverage slowly - this way, bleed-through is less likely.”
Simple seating
Reupholstering may seem like a daunting prospect, but according to Edinburgh-based furniture restorer Kevin Marr of Absolute Upholstery, most people could tackle a simple item such as a dining room chair. “Start by removing existing tacks or staples with a mallet and chisel, then strip off existing fabric,” he says. “If your chairs were made before 1985 you will need to replace the foam in order to meet fire regulations - go to your local upholstery supplier and purchase one-inch foam for the tops of the chairs. Glue the foam onto the wooden base using spray adhesive.
“Now, proceed with the new cover. Roughly two metres of fabric will cover four standard size dining room chairs. Using a hand-held staple gun, wrap the new fabric around foam and try to pull the fabric until you feel a nice firm tension and then staple new fabric down. Finally, measure out a piece of linen and staple it to the underside of the chair to cover it.”
Get the picture
“I specialise in adding images to pieces but once you know how to do it, you open up so many options,” says Emily. “You can use traditional decoupage, where you print your image on paper. Its a good idea to seal the print before you apply it with spray sealer so the ink doesn’t run. Once dry apply the image to the piece using Mod Podge (an all-in-one glue, sealer and finish), build up the layer three to five times and then you can also use a clear matt varnish on top for extra protection. Over time the image will sink into the furniture and look like it was painted on.”
• This article was produced as part of a partnership between the Scottish Government and The Scotsman